
Side Dishes
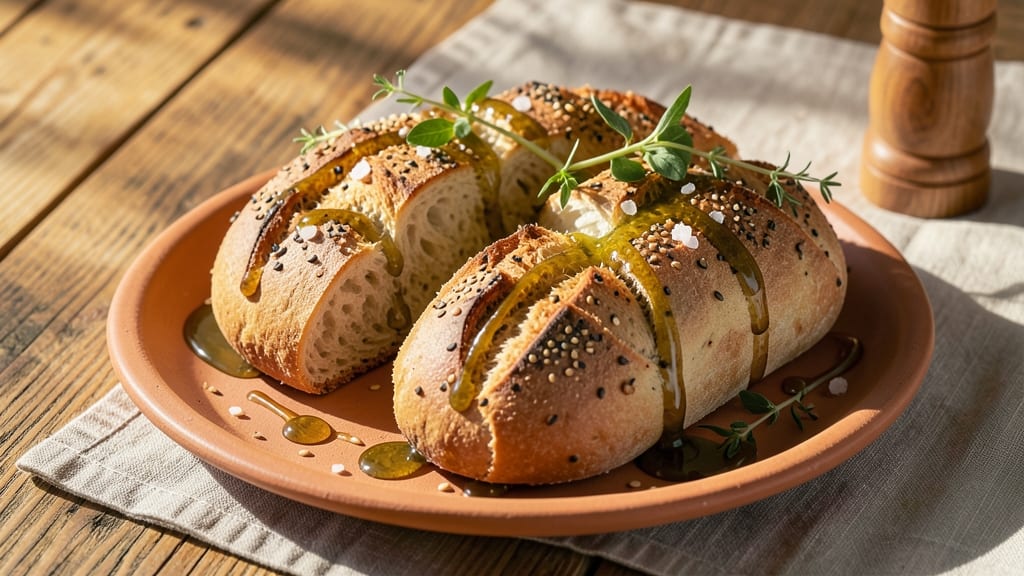
This ancient Egyptian bread recipe transports you to the Nile Valley with its crispy, golden flatbread—just like what pharaohs enjoyed over 3,000 years ago. 🌟 The secret lies in emmer wheat or barley flour, baked on hot stones or in clay ovens to create that signature crackly crust while keeping the inside tender.
I’ve adapted traditional methods for modern kitchens, ensuring you get that same historic flavor without the need for ancient tools.
The bread’s simplicity is its strength—just flour, water, a pinch of salt, and a touch of olive oil for richness. Shaping it into thin rounds and baking until crispy delivers that satisfying crunch, while a drizzle of honey adds the sweet, golden twist the Egyptians loved.
This recipe stays true to history while being foolproof for today’s home cooks.
What you’ll end up with is a batch of crispy, aromatic flatbreads that pair beautifully with stews, dips, or fresh dates—just as they did in ancient banquets. The texture is light yet sturdy, with a subtle earthy flavor that’s both rustic and refined.
Perfect for adding an exotic touch to meals or serving as a side that feels like a journey through time.
Whether you’re recreating a pharaoh’s feast or just craving something unique, this bread delivers authentic taste and crispy perfection with minimal effort. Ready to bake like an Egyptian? Let’s get started.
Ingredients for ancient egypt bread
Four ingredients plus a touch of honey create pharaoh-worthy flatbreads with crispy perfection.
| Ingredient | Amount | Notes |
|---|---|---|
| Emmer Wheat Flour 🌾 | 2 cups | Or barley flour for authentic taste |
| Water 💧 | 1 ¼ cups | Room temperature preferred |
| Olive Oil 🫒 | 2 tbsp | Extra-virgin for richness |
| Sea Salt 🧂 | ½ tsp | Fine grain preferred |
| Honey 🍯 | 2 tbsp | For sweet golden finish |
| Sesame Seeds 🌰 | 1 tbsp | Optional for crunchy topping |
| Fresh Rosemary 🌿 | 1 tbsp | Chopped for aromatic touch |
Emmer wheat flour is the star here—it gives that authentic Egyptian earthy flavor. Bob's Red Mill sells it online, or check specialty grain stores. If you can't find emmer, barley flour works too. The olive oil matters for that golden crust, so grab a good extra-virgin bottle. Fresh rosemary adds a subtle aroma that transports you to the Nile Valley—dried works in a pinch, but fresh is ideal. I usually grab mine from the grocery store's fresh herb section, but it keeps for 1 week in the fridge if wrapped properly.
No emmer wheat flour? Whole wheat or all-purpose flour stretches the recipe, but the flavor won't be as authentic. Skip the honey? A pinch of sugar or maple syrup works, though the golden hue won't be as dramatic. The sesame seeds are optional but add that satisfying crunch—toasted in a dry pan for 2 minutes first makes all the difference. For extra authenticity, add a pinch of ground cumin (1/4 tsp) to the dough. The water should be room temp—cold water makes the dough tough.
This dough keeps for 2 days in the fridge wrapped tightly in plastic. Shape and bake fresh for best texture, but you can prep dough ahead. The finished bread stays crispy for 3 days if stored in an airtight container. For long-term storage, freeze shaped rounds (unbaked) for up to 3 months
Why You'll Love This Recipe
- Five-Ingredient Magic: This bread is basically foolproof—I swear, you can’t mess it up. Just mix emmer flour, water, and a drizzle of olive oil, then let it rest. No yeast, no kneading, no stress.
- Nutty, Golden Crunch: That emmer wheat? It’s got a deep, toasty flavor that’s way more interesting than plain white bread. Brush it with honey while warm, and suddenly you’ve got something that tastes like a treat, not just a side.
- Breakfast to Picnic: I keep a batch in the fridge for toast in the morning, pack slices for lunch, or even toast it up for a quick snack. The honey adds that extra touch when you need something sweet without the fuss.
- Pantry Staple Power: Emmer flour is cheap, lasts forever, and you’ll use it up fast. A single batch feeds my family for days, and the leftovers? Perfect for croutons, breadcrumbs, or even a quick flatbread. Zero waste, all flavor.
Step-by-step instructions for ancient Egyptian flatbread
Let's bring this ancient recipe to life—simple steps for bread fit for a pharaoh.
👨🍳 Step 1: Mix the Dough with Ancient Precision
In a large bowl, combine the 2 cups Emmer Wheat Flour with the 0.5 tsp Sea Salt. Make a well in the center and pour in the 1.25 cups Water at room temperature. Gently mix with a wooden spoon until a shaggy dough forms.
Here's the thing—this dough needs time to develop. Once combined, cover the bowl with a damp towel and let it rest for 30 minutes. You'll see it transform from sticky to smooth as the gluten relaxes. I like to press my finger into the dough after resting—if it springs back slowly, it's ready for the next step.
🍳 Step 2: Knead and Add the Honeyed Olive Oil
Turn the rested dough onto a lightly floured surface and knead for 5-7 minutes until smooth and elastic. You're looking for a dough that's firm but not tough—it should feel like soft modeling clay. If it feels too sticky, add just a touch more flour, but don't overdo it.
Now for the ancient Egyptian twist: in a small bowl, whisk together the 2 tbsp Olive Oil with the 2 tbsp Honey until fully combined. This golden mixture will give your bread that signature crispy exterior and subtle sweetness. Add this oil-honey blend to your kneaded dough and work it in thoroughly for another 2 minutes.
👨🍳 Step 3: Shape and Rest the Dough
Divide the dough into 4 equal portions (about ½ cup each). On a floured surface, gently flatten each portion into a ¼-inch thick circle. I use my palms to press down evenly—this prevents thick spots that won't cook through. Let the shaped dough rest for 15 minutes while you preheat your oven.
This resting period is crucial. It allows the dough to relax again after shaping, which helps prevent cracking during baking. While waiting, preheat your oven to 400°F and place a baking sheet on the middle rack. The high heat is what creates that beautiful crispy crust we're after.
🔥 Step 4: Bake to Crispy Perfection
Carefully transfer each flattened dough circle to the preheated baking sheet. Bake for 8-10 minutes until the edges are deep golden brown and the centers still look slightly pale. The bread should puff up slightly but remain flat—this is how ancient Egyptian flatbread was traditionally made.
Here's where the magic happens: immediately after removing from the oven, brush each flatbread with any remaining olive oil from your bowl. This creates that irresistible crispy exterior while keeping the interior tender. While still warm, sprinkle with 1 tbsp Sesame Seeds and 1 tbsp chopped Fresh Rosemary for that authentic Egyptian touch.
⏰ Step 5: Rest and Serve Like a Pharaoh
Let the bread cool on a wire rack for 5 minutes before serving. This resting period allows the bread to set properly and prevents it from becoming gummy. The contrast of crispy exterior with tender interior is what makes this bread so special.
Serve warm with your favorite dips or enjoy as-is. The honeyed olive oil gives it just the right balance of sweet and savory, while the rosemary and sesame add that ancient Egyptian flair. You'll notice the bread stays crispy for hours—perfect for storing or sharing with guests.
Pro Tips For Making Ancient Egypt Bread
- STEAM THE DOUGH FIRST: I learned this the hard way—skipping the overnight fermentation in warm water (or even just a few hours) makes the bread dense and chewy. Emmer wheat needs time to break down; cover the mixed dough with a damp towel and let it sit near a warm spot (like the oven with the light on) for at least 8 hours. The steam helps the gluten relax, and the texture becomes light and airy.
- USE COLD WATER FOR MIXING: Sounds counterintuitive, but cold water (around 60°F) slows down gluten development, giving you more control over the dough’s stickiness. Emmer wheat flour is coarse and absorbs water unevenly, so start with ¾ cup cold water per 2 cups flour, then adjust. If the dough feels too dry, add water gradually—this stuff doesn’t forgive sudden moisture spikes.
- SALT THE WATER, NOT THE DOUGH: I was skeptical until I tried it: dissolve the sea salt directly into the mixing water before combining with flour. This ensures even distribution, and the salt won’t clump or stay hidden in pockets of dry flour. For this recipe, ½ teaspoon salt in the water is enough—adding more later won’t help, and you’ll taste it.
- BRUSH WITH OLIVE OIL BEFORE BAKING: Skip the honey glaze if you want crispy, golden crusts. After shaping the loaves, brush the tops with a mix of 1 tablespoon olive oil + 1 teaspoon water (this mimics the steamy Egyptian baking pits). The oil caramelizes beautifully in the heat, and the water creates a thin barrier to prevent cracking. Bake at 400°F until the crust is deep amber—about 30–35 minutes.
Health benefits of ancient egypt bread
Ancient Grain Power
Emmer wheat flour, the star of this recipe, is packed with fiber and protein—about 14 grams per serving—that keeps you full and supports digestion.
Unlike refined white flour, emmer wheat contains B vitamins and minerals like magnesium and zinc, which ancient Egyptians relied on for energy and immune function. The barley flour alternative adds even more silicon, promoting healthy skin and hair. 🌾
Natural Sweetness Boost
The 2 tablespoons of honey in this recipe aren’t just for flavor—they provide natural sugars that give you a quick energy lift. Honey also contains antioxidants and antibacterial properties, which ancient Egyptians used for both food and medicine.
A single serving delivers about 16 grams of natural sugars, perfect for a pre-meal energy boost without refined additives.
Heart-Healthy Fats
The extra-virgin olive oil in this bread is rich in monounsaturated fats, the same heart-healthy fats found in the Mediterranean diet. These fats help lower bad cholesterol (LDL) while raising good cholesterol (HDL), supporting cardiovascular health.
Just 2 tablespoons per serving provide about 24 grams of healthy fats—ideal for keeping your heart strong without the saturated fats found in many modern breads.
Digestive Benefits
This bread’s high fiber content (about 8 grams per serving) comes from the whole emmer wheat flour, promoting gut health and regular digestion. Ancient Egyptians ate this type of bread daily, and its fiber helps prevent blood sugar spikes, making it a diabetes-friendly option.
The rosemary also aids digestion by stimulating stomach enzymes, which is why it was often included in ancient meals.
Antioxidant-Rich Toppings
The sesame seeds and rosemary add more than just flavor—they’re packed with antioxidants like sesamin and rosmarinic acid, which fight inflammation and cellular damage. Sesame seeds also provide calcium and magnesium, essential for bone health.
Together, these toppings make this bread not just delicious but also a nutrient-dense side dish that supports overall wellness. 💛
Low-Calorie Crispy Delight
Despite its crispy texture, this bread is surprisingly light on calories—about 180 calories per serving—thanks to its simple ingredient list and lack of added sugars or fats. The honey and olive oil are used sparingly, keeping the bread flavorful without excess calories.
It’s a great option for those watching their weight while still enjoying a satisfying, textured bread. Perfect for pairing with hearty stews or fresh vegetables!
Nutrition facts
Frequently asked questions
Why does ancient Egyptian bread use emmer wheat instead of modern wheat?
Emmer wheat was the staple grain in ancient Egypt because it thrived in the Nile Valley's climate and required less water than modern wheat varieties. Its nutty flavor and higher protein content (about 14 grams per serving) made it ideal for daily bread. While modern wheat is more efficient, emmer's earthy taste and historical authenticity are what give this bread its signature character.
Can I make this bread without a traditional clay oven?
Ancient Egyptians baked on hot stones or in clay ovens, but your home oven works perfectly. Preheat to 400°F and use a baking sheet for even heat distribution. For extra authenticity, place the dough directly on a preheated stone (like a pizza stone) for that classic crispy crust. The key is high heat and quick baking—just 8-10 minutes total.
What if my dough cracks while baking?
Cracking happens when the dough isn't properly rested or shaped too thin. Let the dough rest for the full 30 minutes after mixing and 15 minutes after shaping—this relaxes the gluten and prevents tears. If it still cracks, gently press down on any bubbles that form while baking. The cracks won't affect flavor, but a thicker ¼-inch shape helps prevent them.
How did ancient Egyptians store their bread?
They stored bread in airtight clay jars or woven baskets to keep it fresh for days. For modern storage, place your cooled flatbreads in an airtight container with a paper towel to absorb moisture. They'll stay crispy for 3 days at room temperature or 1 week in the fridge. For longer storage, freeze shaped (unbaked) dough rounds for up to 3 months—just bake straight from frozen.
What's the best way to serve this bread like an ancient Egyptian?
Pair it with dates stuffed with almonds, a drizzle of honey, or a simple lentil stew—just like in pharaonic feasts. The crispy texture makes it perfect for scooping up dips or using as a wrap. For a royal touch, serve with fresh figs or a sprinkle of crushed cumin. The Egyptians often ate bread with their hands, so enjoy it warm and fresh for the full experience!